Just gazing at the Northern Lights is a mesmerising experience, but capturing them on camera? Now that’s a whole different story! If you’re planning a trip to witness this enchanting natural light show, we’ve got you covered with some top tips to help you snap the perfect shot. From choosing the right equipment to mastering camera settings, read on to discover how to capture the beauty of the Aurora Borealis like a pro.
Gear Up or Miss Out
Cameras that Can Catch the Cosmos
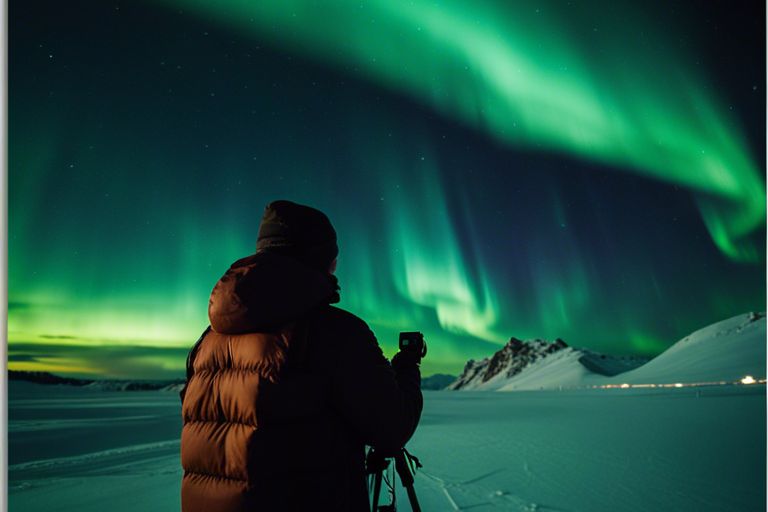
To capture the dancing lights of the Northern Lights, you’ll need a camera that can handle the celestial show. Look for a DSLR or mirrorless camera with manual settings to adjust exposure and focus to perfectly frame the colourful display. A sturdy tripod is important to keep your camera steady during long exposure shots of the aurora borealis.
Battling the Cold: Accessories to Endure the Night
Battling the freezing temperatures while waiting for the Northern Lights can be a challenge, but with the right accessories, you can stay warm and comfortable. Invest in thermal clothing, hand warmers, and toe warmers to keep the chill at bay. A good pair of touchscreen gloves will allow you to adjust settings on your camera without exposing your hands to the cold.
Cold weather can be a photographer’s worst enemy when trying to capture the Northern Lights. Be sure to pack extra batteries as cold temperatures can drain them quickly. Consider bringing a weatherproof camera bag to protect your gear from the elements and keep spare batteries close to your body to keep them warm and fully charged.
Location, Location, Illumination
Chasing Shadows: Finding the Perfect Spot
Illumination: You’re all set with your camera gear, but where should you position yourself to capture the dancing colours of the Aurora Borealis? Finding the perfect spot can make or break your Northern Lights experience. Look for remote locations away from light pollution, such as open fields or lakeshores, for a clearer view of the night sky.
When Nature Calls: Timing Your Aurora Adventure
Any idea what time the Northern Lights will make their grand appearance? Timing is everything when it comes to witnessing this natural wonder. Keep an eye on the weather forecast and aim to go out during clear, dark nights. The best time to catch the Aurora is usually between 10 pm and 2 am, so stay up past your bedtime for a chance to see the sky come alive.
Composition and Patience
Setting the Stage: Framing the Phenomenon
Phenomenon Unlike any other, the dancing lights of the Aurora Borealis demand a carefully composed frame to truly capture their magic. When setting up your shot, consider including interesting foreground elements such as trees, mountains, or even a quaint cabin to create a sense of depth and scale in your photographs.
Click and Wait: The Virtue of Patience in Night Photography
Virtue In the world of night photography, patience truly is a virtue. Capturing the elusive Northern Lights requires a combination of good timing, camera settings, and a whole lot of waiting around in the dark. But trust us, when those vibrant colours start painting the sky, all that waiting will be more than worth it.
Framing So next time you find yourself standing in the freezing cold, gazing up at the night sky, remember to frame your shot with care, set your camera to a long exposure, and embrace the art of patience. The Northern Lights may be unpredictable, but with the right composition and a healthy dose of patience, you’ll be well on your way to capturing a truly magical moment.
Next-Level Northern Lights
Now, let’s take your Northern Lights photography to the next level with some advanced tips and tricks.
Advanced Camera Tactics
- Exposure Settings
Adjust your exposure settings to capture the intricate details of the Aurora Borealis. Experiment with longer shutter speeds and lower ISO settings for clearer shots.
- Manual Focus
Switch to manual focus to ensure your camera locks onto the lights in the sky. This helps prevent the camera from hunting for focus in low light conditions.
Editing Magic: Post-Processing Your Polar Pictures
On to the finishing touches! Once you’ve captured the perfect shot of the Northern Lights, it’s time to bring out their true beauty through post-processing magic.
PostProcessing: Dive into the world of editing software and enhance the colours and contrast of your images. Don’t be afraid to play around with the settings – the Northern Lights are all about vibrant hues and striking contrasts, so make them pop on screen like they did in the sky.

